The year is coming to an end and, with it, the many celebrations that call for that extra dose of sparkle, whether that’s in your fashion, hair or makeup.
Maybe you are already equipped with all the glamorous party dresses and all shades of glittery makeup that are just waiting for their moment to shine.
And yet, there is still one more thing left to embellish before you can start the countdown.
What could that be?
Your nails, of course!
New Year’s provides the ideal opportunity to push the envelope further when it comes to nail art. With a fresh new mani, not only will you will have an excuse to go bolder, shinier and more detailed than you would in other seasons, you are also going to fit in perfectly with your festive surroundings.
On the other hand (no pun intended), if you’re a manicure traditionalist, you can always stick to the foolproof array of blacks, reds and golds for that classy, polished evening look.
Whatever your preferred nail aesthetics is, our list of hottest nail art trends for every kind of New Year’s festivities features a diverse collection of mani designs that range from minimalist to elegant to full, three-dimensional glam.
We are positive it will inspire you to give your nails a chic makeover that will give an extra unf to any party outfit.
Red & Rhinestones
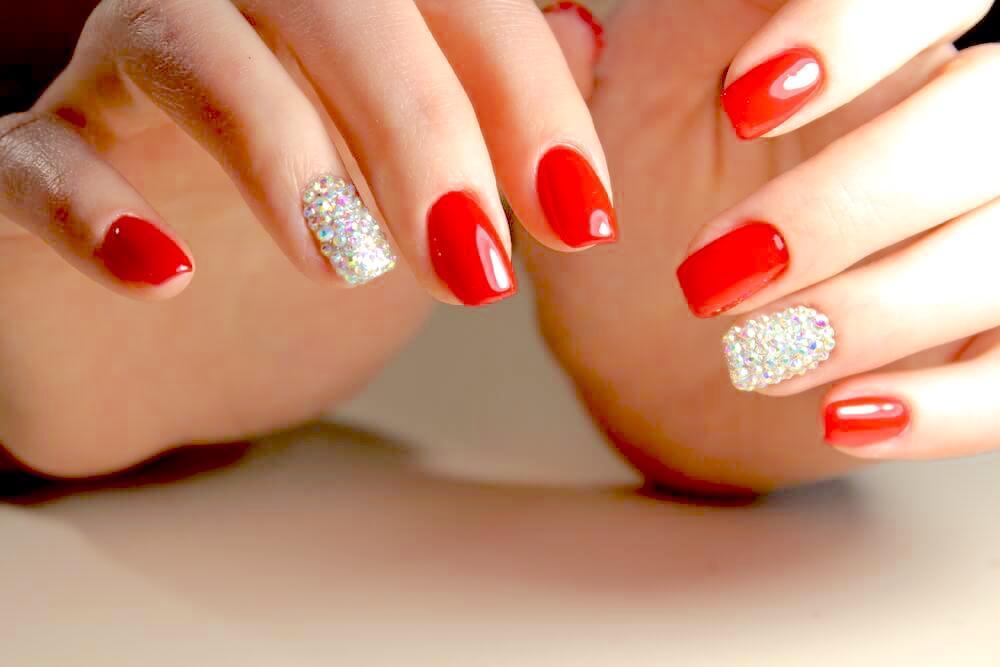
Everyone loves a long red nail. It’s chic, timeless and can make you like an old Hollywood diva in an instant.
Still, perhaps you feel like your go-to ruby doesn’t quite razzle and dazzle enough for New Year’s events.
Luckily, there’s a quick way to make your classic red nails pop while still staying true to your usual style, and that’s rhinestones.
This trendy touch of three-dimensional will instantly make any mani go from just OK to full-on fabulous.
However, this look might feel a little daunting to do without a help of a professional, especially if you’ve never incorporated rhinestones into your mani routine before.
The good news is that, with a little bit of preparation and patience, you won’t have a problem unlocking the rhinestone extravaganza – just follow this simple guide.
Start of by cleaning your nails and filing them to your desired shape. You might want to push back your cuticles to make your nail beds even longer – this will give you more space to work with when you get to the bedazzling part.
Apply a clear coat to prevent chipping and make your design more durable.
Follow it up with your favorite shade of red nail polish: warmer skin tones look best in red with hints of orange or burgundy, while cooler complexions are best complimented with pink and purple-infused reds.
Prepare your rhinestones by laying them out on your working surface.
If you want your studs to be more disperse, try the nail glue technique. Take a toothpick, place a small amount of glue on the nail and stick your rhinestone to it. Place it onto your nail and hold it in place with tweezers until it dries. Repeat until you feel like your nails are bedazzled enough.
If you want your nail(s) to be absolutely dripping in gems, try the topcoat method. Simply add a generous layer of top coat on the nail you wish to adorn and adhere as many embellishments to it as you like.
Apply additional layers of top coat over your rhinestones to make sure your precious work of art won’t budge. Bejeweled look complete!
Icy Blue Gradation

This gorgeous, winter-themed ombré is the perfect mani look for every girl who wants to channel her inner ice queen this season.
If you’ve haven’t been able to catch up with the wildly popular ombré nail trend until now, we’ve got you covered: here is a simple step-by-step explaining how to achieve the cool gradient effect with very little effort.
To begin with, remove any polish you might be wearing and use a file to shape your nails.
Next, coat your nails with a clear base polish. This will make your design last longer, prevent the polish from chipping and block the lacquer from staining your nails. Win-win!
Follow up the clear coat with a color that will be the base for your ombré. The first layer of your gradient nails should always be the very lightest hue of the final look. In this case, that’s white, and if you want to achieve the icy, frozen effect, pick a true, crisp white over creams and beiges.
Now, for the fun part! Take a makeup sponge and paint your ombré colors on it – white and cool-toned blue – in two horizontal lines.
Tap the sponge onto your nails until you reach desired effect. Re-apply the lacquers on the sponge in between painting two nails. Once you feel like your ombré looks just right, let your nails dry, then apply a top coat.
Dip a Q-tip into nail polish remover and clean your fingers from any excess lacquer. Your frosty mani look is finished!
A Touch of Glitter

If you’re not into elaborate 3D nail designs, but still want to add a bit of twinkle to your reds, maybe it’s best to stick to good old glitter, a fool-proof addition to any nail design.
A very chic way to rock your mani these days is to keep the glitter contained to one nail, but do so in way that makes it count.
The key to achieving that sparkle-packed look is to use loose glitter or glitter dust. It doesn’t have to be specifically made for nails – makeup glitter will do just as well.
This particular look uses red tones, but you can adapt it to any other color and just compliment it with glitter in the matching shade.
Let’s get to it!
Start off by tidying up your nails and shaping them the way it flatters your hands.
Apply whatever is your go-to red lacquer, painting the nail(s) you want to cover in glitter last.
While the polish is still tacky, dip your nail flat into the pot of loose glitter, rolling it around to make sure you cover its entire surface.
Dust off excess glitter; if you sense there some uneven bits, use your finger to press them down and flatten the layer.
Remove any stray glitter from your cuticles with a feathery brush (eye shadow blending brush can be a useful tool for achieving this).
To ensure the glitter won’t budge, apply three or four layers of top coat. Do so gently, so you don’t wipe off any glitter or mess up its placement.
Let it dry and you’ve completed the look: glitter that packs a punch.
Mandala Pattern in Nude and White
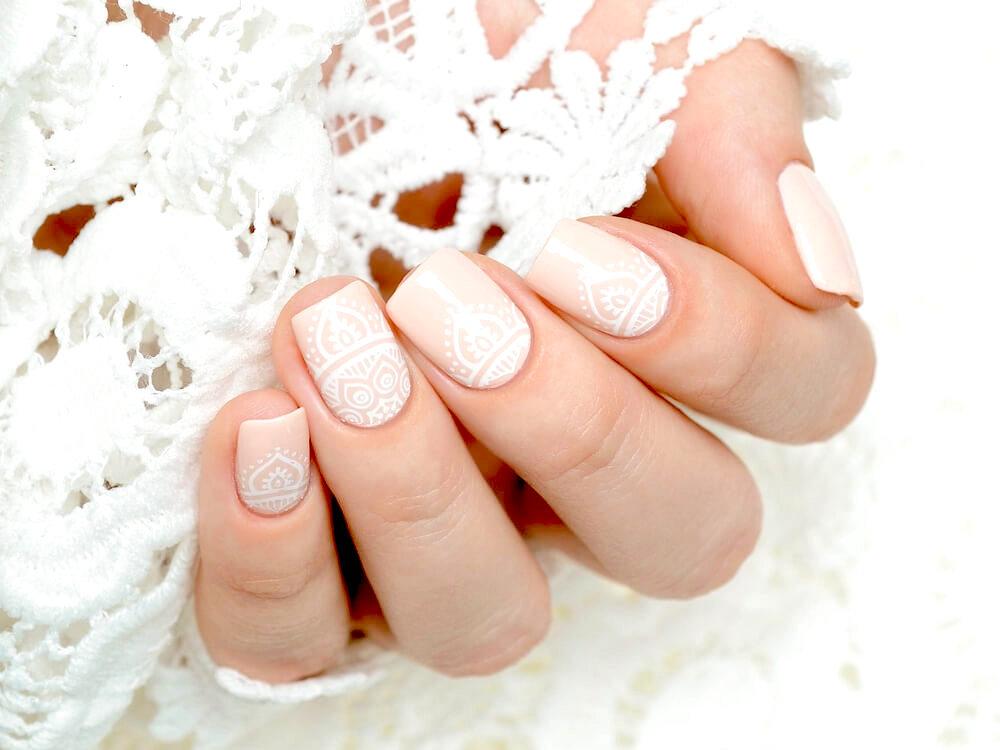
If you’re the kind of gal who simply can’t picture her nails in anything other than the super-subtle nude, don’t worry – there are still ways to tweak your minimalist mani to give it that magic winter vibe.
One of them is this soft, understated look that features a white mandala-inspired design.
Here is how you can achieve it.
Start off by applying your go-to nude lacquer.
If you’re not normally a nude polish wearer, here are some tips on how to choose the right lacquer:
- Consider your skin tone: if you tend to have warm or olive skin, go for a polish with hints of cinnamon, coffee and caramel; cooler complexions will look best with nude polish with a dash of pink or lilac
- Nude shades tend to look best when they have cream finish, as opposed to matte or shimmery
- Go for a shade that matches your undertone but is slightly darker or lighter than your natural complexion – this will create contract and look even better against your skin
Once you’ve found your ideal shade, it’s time to drench your nails in that lovely nude color.
Coat them at least two times, making sure that each layer is evenly distributed on your nail beds.
Now it’s time for the embellishments!
Are you a manicure virtuoso who can singlehandedly paint tiny mandalas without the help of a professional? Then go ahead and create your very own nail-sized masterpieces.
If not, you still shouldn’t sweat – that’s what nail art is for!
The most important rule when dealing with nail art is that your polish needs to be 100% dry before you proceed to adorn it with stickers or other decorations. This will ensure the stickers adhere properly and last longer.
If the stickers are too big, trim them beforehand so they can sit perfectly on top of your nail beds.
Carefully pick them up with tweezers, applying them so they are flat and even against your nails.
Once you are happy with the finished look of your nails, paint them over with a clear top coat and let them dry. Now you have your own little mandalas!
Black and Gold Ombré Mani
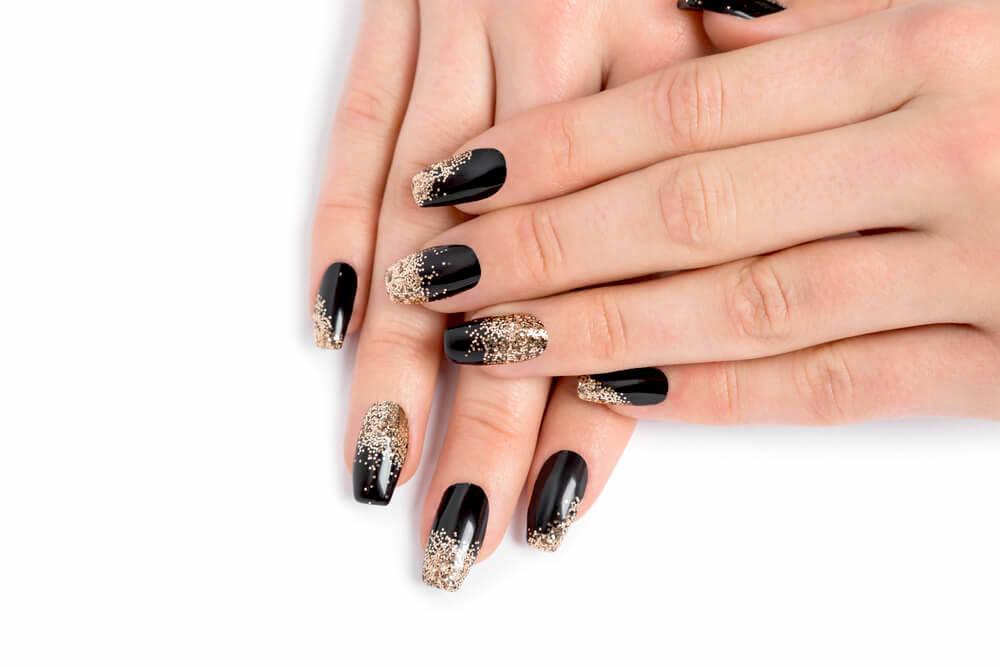
Nothing says New Year’s celebrations like the sound of champagne being popped open when the clock strikes midnight.
If you ever wanted your nails to embody that fabulous feeling, try recreating this lush look that features sleek black polish dripping in gold glitter.
Begin by cleaning up your nails and filing them to a desired shape. Prime your nails with a base coat for longevity.
Pick a glossy, vinyl-like shade of black that will serve as your main color. Coat your nails at least twice to achieve that rich, saturated effect that will be a perfect backdrop for the glitter that’s about to follow.
Begin creating your ombré by taking a highly pigmented gold glitter polish and wiping the brush on the neck of polish bottle.
Apply the first layer of glittery gold polish either from the middle of the nail toward the tip or from the bottom of the nail toward the middle, depending on which look you prefer. You can also combine the two.
Allow the first coat to dry completely before moving on with the second.
Continue the gradation by applying another coat of gold polish from the midway point of the first glittery layer. You can continue adding the coats of glitter until you achieve the seamless transition. Finally, dab a brush into your gold polish and lightly tap it onto the point where the glitter “begins”, to further intensify the look.
Seal in this elegant look with a top coat to make sure all that glitz stays in place.
Suit Up!
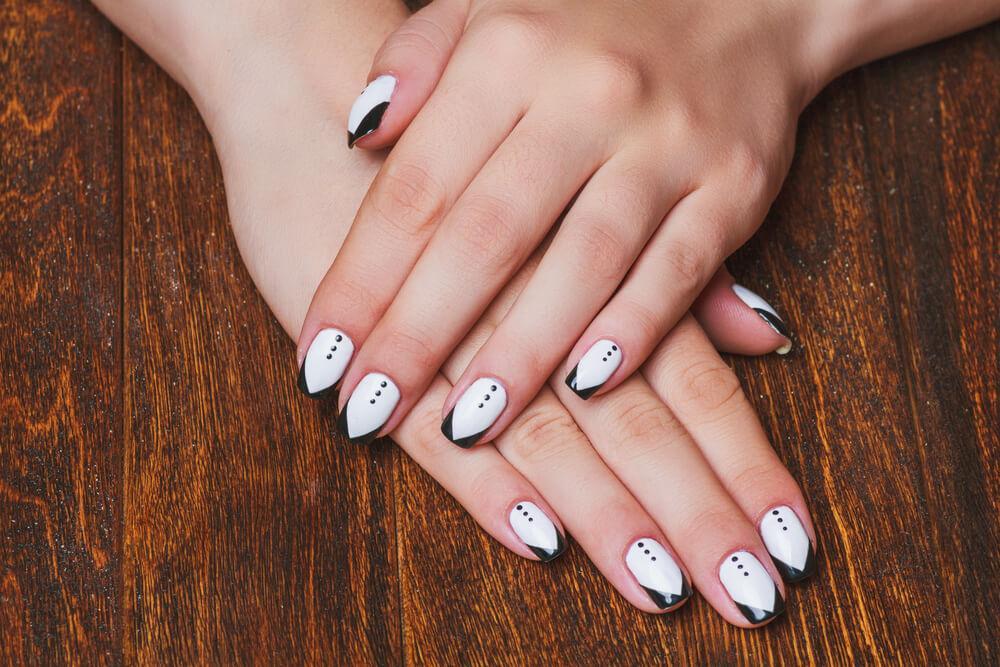
What better way to make your nails stand out at any New Year’s party than to literally put them in suits?
We can’t think of any.
That’s why this fun, graphic design might be perfect for all the girls who’d like to keep their mani elegant with a touch of humor.
Even though the tiny nail-tux might seem like a real manicure challenge, if you follow these simple instructions, we’re sure you won’t have any troubles getting this look just right.
Start by cleaning up your nails and filing them. Try to achieve a square-like shape, as this will lend itself better to the design.
Coat them with a clear base layer.
Choose a matte, opaque white lacquer and apply several coats until it gives you a clean canvas for your suits.
Next, take a fine brush (you don’t need a professional nail brush, art or makeup brush can do just fine) and dip it into a black nail polish.
Draw two diagonal lines starting from the midpoints on the sides of your nails, so they meet in the middle of the tip.
Fill them in and – voila – you have your lapels.
For buttons, use a toothpick that you dipped into the black lacquer.
Create the buttons for your tuxedo by dabbing three small points on the middle parts of your nails.
And there you have it: your mani is complete and ready to attend even the fanciest black tie event.
Now that you know how to achieve all the hottest nail looks for the season, it’s time to finally wave goodbye to 2017 with the freshest, trendiest mani on your hands.


Leave A Comment